
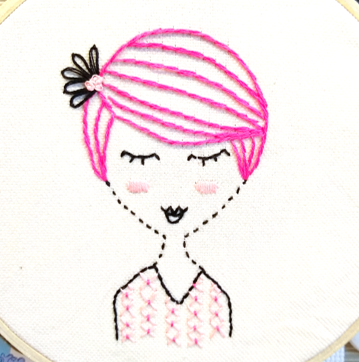
Use simple stitches to create a unique portrait!
In this presentation, you’ll learn a few basic stitches in order to create an easy needlepoint portrait. Use your creativity and your imagination! The one used as an example here was drawn and made completely from scratch, but it was heavily inspired by different embroidered portraits and dolls on Pinterest. If you’re looking for inspiration, there are lots of different styles and difficulty levels exhibited on crafty sites like Pinterest, or even just by doing a quick Google search for “easy embroidery portrait.” You don’t even have to design a person! Animals make great subjects for these tiny works. The more simplified, almost cartoonish, you can make it, the easier it will be for now.
Use simple stitches to create a unique portrait!
In this presentation, you will learn a few basic stitches in order to create an easy needlepoint portrait. Use your creativity and your imagination! The one used as an example here was drawn and made completely from scratch, but it was heavily inspired by different embroidered portraits and dolls on Pinterest. If you’re looking for inspiration, there are lots of different styles and difficulty levels exhibited on crafty sites like Pinterest, or even just by doing a quick Google search for “easy embroidery portrait.” You don’t even have to design a person! Animals make great subjects for these tiny works. The more simplified, almost cartoonish, you can make it, the easier it will be for now.
STITCHES I USED
- A) Backstitch
- B) Running Stitch
- C) Satin Stitch
- D) Outline Stitch
- E) Cross Stitch
- F) Couching
- G) Lazy Daisy
- H) French Knot
YOU WILL NEED
Embroidery Hoop
Embroidery Thread
Cloth
Blunt needle
Pencil
Scissors
GETTING STARTED
Lightly sketch a cute portrait onto your fabric. Something very simple is what we’re going for here.
I used a regular pencil, slightly dull so it wouldn’t snag the fabric. If you have pencils with a soft lead, these would be good to use here as well.
For inspiration, Pinterest has a lot of examples!
A NOTE ON EMBROIDERY THREAD
Embroidery thread comes in 6 strands together. Generally speaking, you’ll want to split the threads and only use 2-3 strands for the stitches in this project.
I used 3 strands for each stitch except for the French Knots.
BACKSTITCH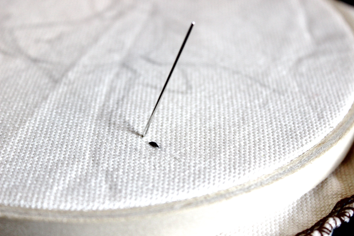
You start by making a knot and coming up through the back of your work and making a regular stitch.
Then come back up a small distance away, but instead of continuing forward with the stitch, you go backwards and stitch into the hole you previously went into. This will create the illusion of a line.
The backstitch is very good for basic outlining.
BACKSTITCH CONT’D
You can make the stitch go in and come back out in the same action (panel 1) or you can simply pull all the way through and then make your next upward stitch separately.
I used backstitch for the shirt outline, the mouth, and the eyes.
RUNNING STITCH
The running stitch is a very simple stitch. You just make a knot and come up through the back, then decide how long you want the stitch to be, how big you want your negative space, and just go up and down, in and out, and that’s it.
You can bunch it up on the needle (panel 1) or go one stitch at a time. Bunching up is a bit more difficult to control, but it goes faster. It makes a very nice dotted appearance if you use shorter stitches like here.
KEEPING THINGS TIDY
Sometimes your fabric will be easy to see through, meaning the back of your work could show through a mess of strings if you aren’t careful.
In order to keep things tidy, I sometimes ran my thread through stitches in the back instead of just letting the string criss-cross willy-nilly wherever my next stitch needed to come out.
I don’t know if this is an “Official Embroidery Technique” or not, but it worked for me.
SATIN STITCH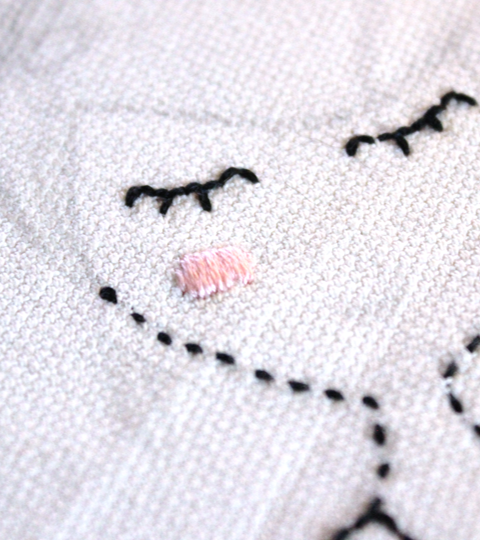
This is a very useful stitch when trying to fill an area with color. You start with a knot and come up through the back, then you’ll enter the fabric across from the exit. You basically make loops with the thread, stitching very close to the entry and exit points to make it a solid fill.
OUTLINE STITCH
The outline stitch is similar to the back stitch, but with a twist. You start with a knot and come up through the back and make a regular stitch.
Then, come up from the back again, but poke through around the middle of the previous stitch, not through the thread (that’s a split stitch), but underneath.
Then stitch back down into the fabric and come back up where the previous stitch had gone in (panel 2).
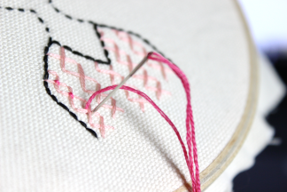
CROSS STITCH
Cross stitch is a popular stitch and has its own entire craft dedicated to it. Here we are using it as a pattern, not as a filler, so the Xs are big.
In order to make this stitch, make a knot and come up through the back where you want to start your line of Xs. Make a row of diagonal stitches as shown. Be careful to line up the tops and bottoms of the diagonals so there won’t be any gaps when you finish out the Xs on the way back up (unless you want gaps, we’re not picky).
When your row of diagonals is long enough, make another row of diagonals on top of the one you just made, but working back up the row.
 COUCHING
Couching is a technique that holds down thread with decorative stitches. It’s basically the running stitch, but with the added purpose of couching other stitches. I used it here to add a decorative element to the middles of the Xs on the cross stitch rows.
LAZY DAISY
This is a very easy way to make flower petals, hence the name of the stitch.
Make a knot and come up through the back of your work where you want the center of the daisy to be.
Go back into the fabric with your needle near where you just came out, still in the center of the flower.
Then, come back up through and out wherever you’d like the tip of your petal to reach.
Before pulling through, wrap your thread under the tip of the needle (panel 1) then pull through gently.
Be careful with your tension on this one. It will determine the size of your petals.
Once pulled through, make a small couching stitch at the tip of the petal to secure it in place, then go back to the center and pull up and through. Then start your next petal. Add as many or as few as you’d like.
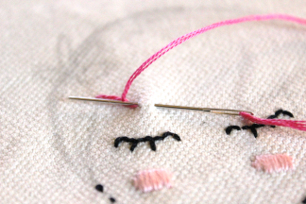
FRENCH KNOT
As I mentioned earlier, I used 3 strands for all the stitches except this one. I wanted the knots to be a bit more bulbous than 3 strands would allow, so I used the full 6 strands for the French knots here.
Start with your knotted string and come up through the back like with all the other stitches. Before going back down through the fabric, wrap the thread around the needle two times. Tension is important for this stitch as well.
Holding the string gently but securely, poke back down with the wrapped needle into the fabric very close to where it came up through. Be sure it’s not in the exact same hole, otherwise it will unravel the knot and will not work. Make as many or as few of these as you want as well.
ALL DONE!
– Jessica, Reference Specialist