
Reach Out!
It’s so important to stay connected these days, and sending letters is a great way to show someone you care. Handmade stationery is an excellent way to add extra crafty pizzazz to your correspondence, and DIY envelopes are sure to impress your friends and family! They’re so easy to make, you may find yourself sending more letters just as an excuse to make more envelopes! Minimal supplies and no experience required!
Let’s get started!
Things You Will Need: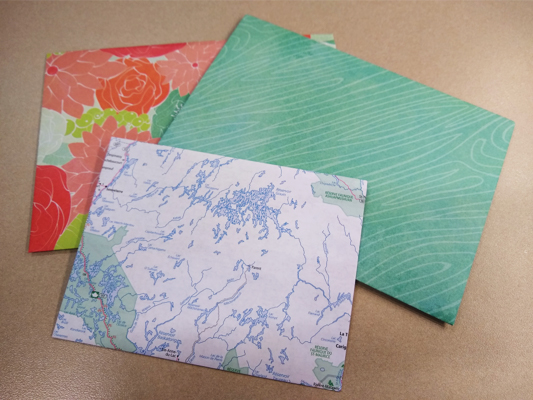
Paper
Scissors
An envelope to copy or a printed template
Glue or double sided tape
Pencil
 ENVELOPE #1
The size of the envelope you want to have will determine the size of paper you need. I used large sheets of craft paper for this first type of envelope, and I used an actual envelope as a template. That way, you know exactly what size you’ll end up with, and you can compare the template to the paper you have to determine if it is the right size or not.
Start with a plain envelope and carefully take it apart.
Trace the outline of the envelope on the back of your patterned paper. This way, if you don’t cut on the line perfectly and miss some pencil marks, you won’t have to go back and erase anything.
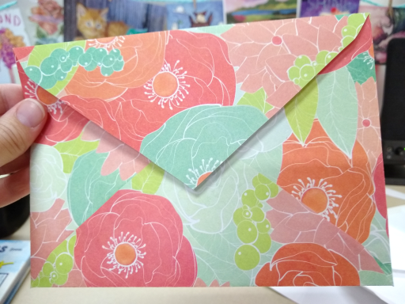
Cut out the envelope and fold along the creased areas. Since you took apart the previous envelope, you’ll be able to see where the creases need to go and where the glue lines are. I used a very thin line of tacky glue to glue down the bottom flap and keep the envelope together. Be careful not to use too much glue, or to glue over more areas than you need to. You may end up gluing your envelope shut on accident!
ENVELOPE #1 FINISHED!
ENVELOPE #2
Old atlases and maps make great paper for envelopes because they are so big! This envelope is made from an atlas page and a template I found online. It’s a smaller envelope and is folded together differently from the first one.
Find Your Template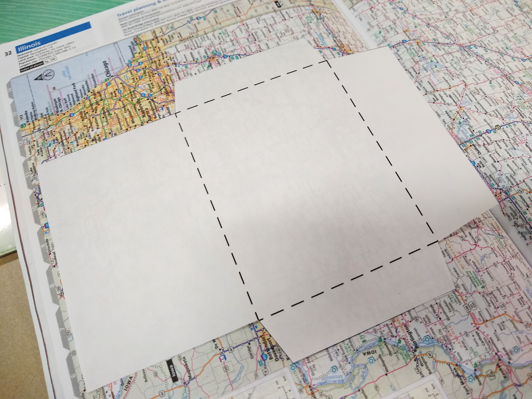
You can search the internet for envelope templates. Find a free one in the right size for your needs and print it out! I liked this one because it looked very simple, but you can find fancy ones if that’s your style instead.
Pay Attention
This step isn’t quite as important if you’re using a patterned paper that has no apparent direction, but if you’re using something directional, like a map, you need to make sure you position your template correctly. Make sure the writing is going in the right direction for the main part of the envelope (it will be upside down for the other parts, that’s unavoidable for this envelope). If you’re having trouble determining which part that’s going to effect, pre-fold your template to see what it will look like as a finished envelope and extrapolate from there.
After tracing your envelope shape onto the paper, cutting it out, and folding it like you did for the first type of envelope, it’s time to glue it.
I used a glue stick for this one since atlas paper is a bit thinner than the craft paper.
Again, be careful not to overdo it with the glue, otherwise your envelope will stick shut in places you don’t want it to.
ENVELOPE #2 FINISHED!
A NOTE ON SENDING DIY ENVELOPES THROUGH THE MAIL
According to the USPS website, colored envelopes may be sent through the mail as long as the address lines are legible and un-obscured. If using a patterned envelope, and if in doubt of potential legibility, you can always affix plain white labels to the envelope and write or print the addresses clearly on those.
Happy Mailing!
(Stay tuned for a tutorial on how to make watercolor flower cards to send in your envelopes!)
– Jessica, Reference Specialist