
 Brrr, it’s cold outside! If you and your child want to enjoy the snow from the cozy comfort of your home, pick up a craft kit from the library this week and create a beautiful homemade snowflake that will stay icy all year long. This craft can also be used to help introduce your child to the science concept of how snow is formed. Follow the link below to see a list of nonfiction children’s books in our catalog that teach kids all about snow.
This craft is recommended for children ages 6 and up and requires adult supervision and assistance since boiling water is involved. Craft kits are available from the atrium or drive-up window while supplies last.
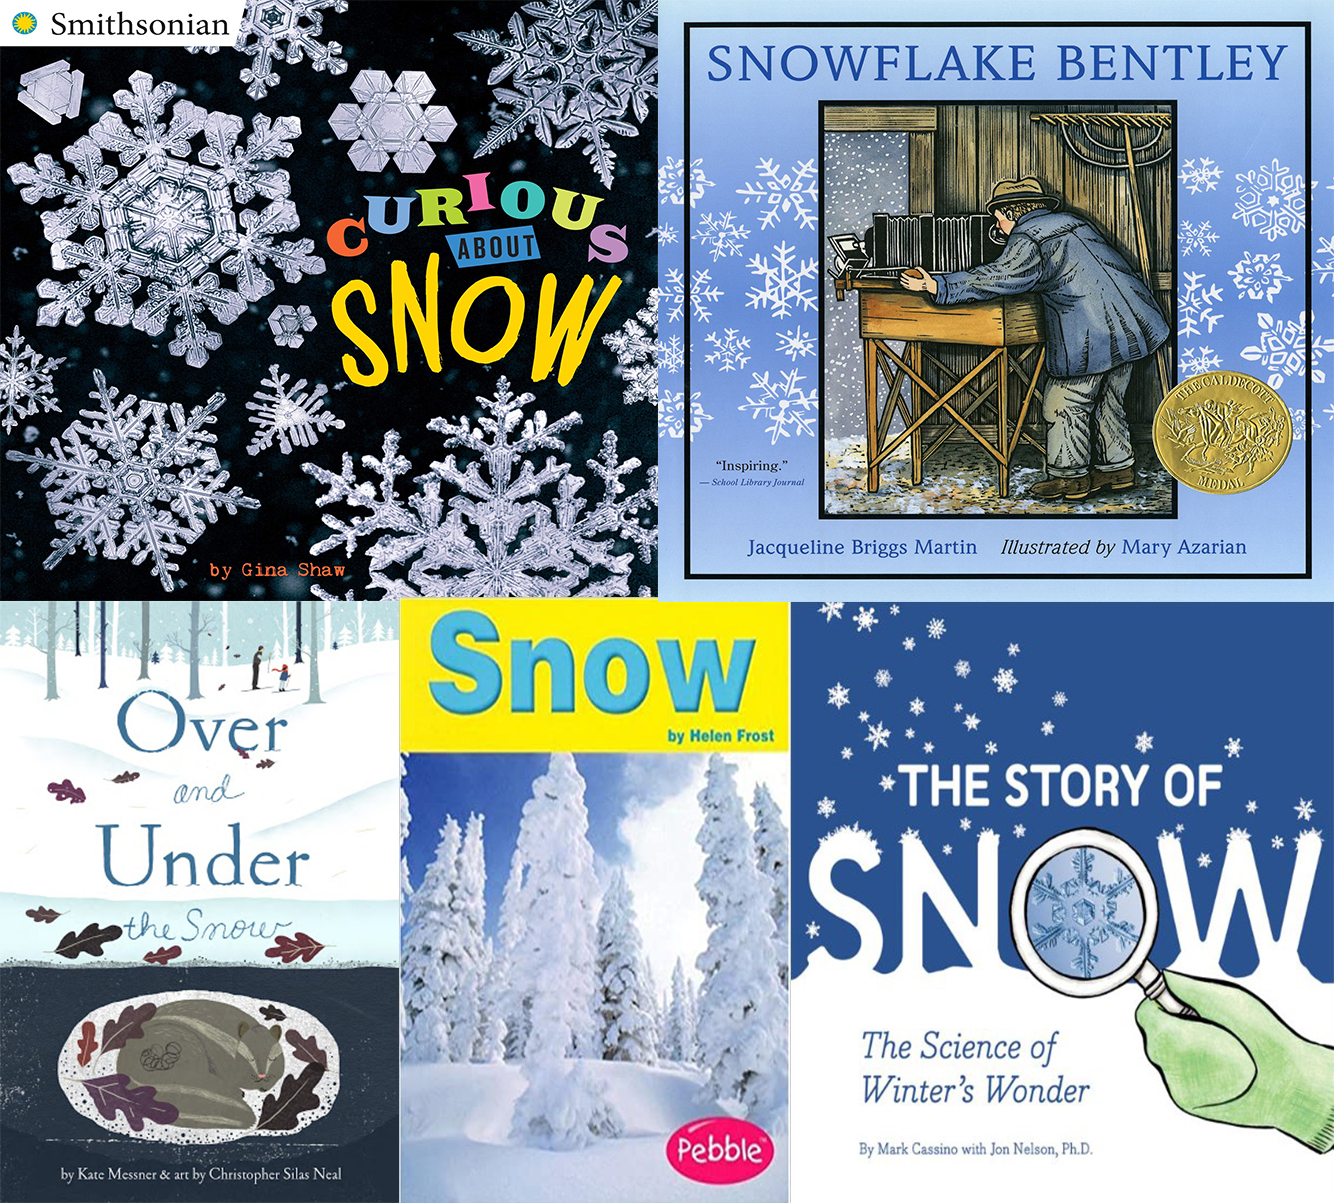
Books on the Science Behind Snowflakes:
- The Story of Snow: The Science of Winter’s Wonder by Mark Cassino and Jon Nelson
- Over and Under the Snow by Kate Messner
- Snow by Helen Frost
- Snowflake Bentley by Jacqueline Briggs Martin
- Curious About Snow by Gina Shaw
Snowflake Experiment Instructions:
Using the instructions below, create a beautiful homemade snowflake you can enjoy in every season. You and your child will create a pipe cleaner snowflake and let it soak in a homemade solution for one to seven days. Watch the snowflake as it slowly grows crystals and turns into an icy treasure! This is also a great activity to introduce the science concept of how snow forms.
***These steps should be closely monitored by an adult for children of all ages since there is boiling water involved. Children may help stir the solution, but if there is any doubt your child may harm themselves, then do this part yourself and have them watch from a safe distance.***
Supplies included in the kit: 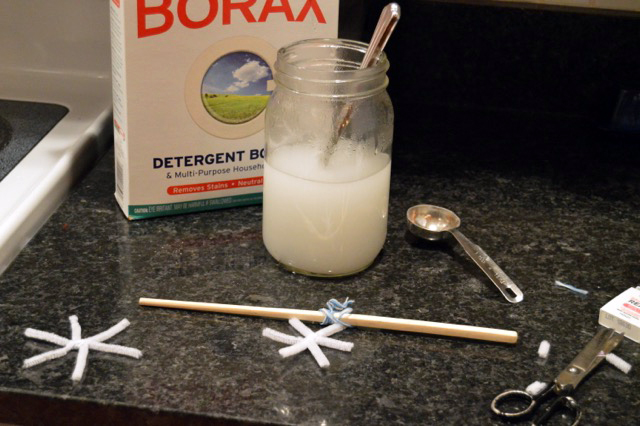
- Pipe cleaners
- Small piece of yarn
Supplies needed at home:
- Wooden pencil (not plastic)
- Borax, sugar, or salt
- Borax will create crystals in about 5 hours, while salt and sugar will need about one week to form
- Wide mouth glass jar or heat-safe cup
- Large measuring cup or heat-safe bowl
- Boiling water
Instructions:
Make a Snowflake:
- Twist the pipe cleaners together to create a snowflake shape. Start by making a T shape with two pipe cleaner pieces. Twist the last two pieces around the center diagonally to the T shape.
Tip: The snowflake will need to fit inside the mouth of the jar, so you can trim the pipe cleaners to fit if necessary. Keep one branch of the snowflake a little longer than the others. This will be the branch we will use to hang the snowflake.
Preparing the Snowflake and Jar:
- Tie the piece of yarn into a loop.
- Bend the long branch of the snowflake around the bottom of the yarn loop and then twist it back onto itself to secure it to the yarn.
- Thread your pencil through the loop of yarn.
- Let the snowflake hang in the jar while the pencil rests on top.
Making Your Snowflake Solution:
- ADULTS ONLY. You will need to boil water to use in your mixture. To save time, have your water boiling as you make your snowflakes.
- ADULTS ONLY. Pour the boiling water into a large measuring cup or heat-safe bowl.
- Add 3 tablespoons of Borax, sugar, or salt for each cup of water. Add the tablespoons one at a time. Stir in between each tablespoon until the powder is dissolved.
Making the Crystal Snowflake: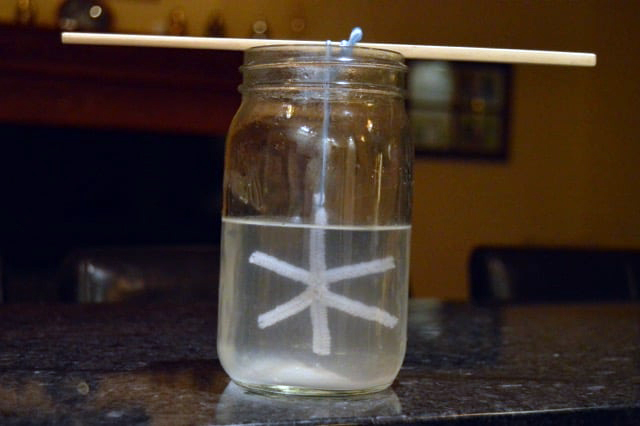
- Use a washable marker or a piece of tape to mark the place on the jar where the water will fully submerge the snowflake but not the yarn loop.
- Remove your pipe cleaner snowflake from the jar.
- ADULTS ONLY. Pour your solution into your jar to the fill line. The solution should look a little foggy.
- Hang your snowflake in the jar as before, but now it will be submerged in the solution.
- If you used Borax, let the jar sit undisturbed for about 5 hours or overnight. If you used salt or sugar, it will take about one week for the crystals to form.
- After removing the snowflake from the solution, let it dry on a folded paper towel. You can now enjoy snow all year round!
Credit: blissfullydomestic.com and realfoodrn.com
– Haley, Youth Services Assistant