
Since I’ve kept a journal since I was a kid, I was so excited when I discovered that I could make my own! There are tons of ways to make a journal, but today I’m going to share with you a simple version that you’ll be able to repeat if you like doing this one. Journal kits are available from the Youth Services department or the drive-up window while supplies last.
The materials that are included in your kit:
- 7.5 x 11 in sheet of pre-punched heavy cardstock for the cover
- 2 packets of 10 folded sheets of paper cut to 7 x 10.5 in for the pages of the journal
- 2 pieces of paper cut to 7 x 10.5 in to glue to the inside covers
- 1 yd of embroidery string to attach pages to the cover
- 6 yd of crochet yarn for the embellishment of the cover
- 1 plastic needle
You will need to provide a glue stick in order to glue the two white sheets of paper to the covers (optional). I recommend using duct tape as well to reinforce the outside while you sew the yarn around the outside of the cover – that is also not included in the kit.
Step 1: Attach the Pages to the Cover
- Align the first set of folded papers so that the holes punched along the fold line up with the three holes punched through the heavy cardstock cover.
- Thread the embroidery string through the eye of the plastic needle and open the folded pages up to the middle of the pack, so that the string will sew all the pages to the cover.
- String the needle through the middle hole starting on the outside.
- Pull the string through the hole leaving about a 6 inch tail on the outside, then thread the needle through the top hole from the inside. Pull tight.
- Go back through the middle hole, from the outside to the inside, just like in Step 3.
- Pull the string tight then thread the needle through the bottom hole from the inside to the outside.
- Pull tight and push the needle back through the center hole, going only through the cover this time.
- Align the second pack of papers to the holes on the cover and push the needle through the center hole in those papers, like in Step 3 for the first packet of papers.
- Pull tight, then thread the needle through the bottom hole from the inside to the outside.
- Pull tight, thread the needle through the center hole from the outside to the inside, making sure to pass the needle through the center hole in the second pack of papers.
- Pull tight, then thread the needle through the top hole from the inside to the outside.
- Pull both ends of the string tight, then tie a square knot as close to the center hole as possible. You can cut the extra string or leave it as part of the embellishment.
Step 2: Decorate the Cover
- Thread the crocheting yarn through the needle.
- Starting at the top or bottom of the spine, pull the needle through the hole from the outside of the cover to the inside of the cover.
- Loop the needle over the top of the cover, then pull the needle through the next hole, from the outside to the inside.
- Repeat Step 3 all the way around the journal, until you get back to the hole where you started.
- Tie the two ends of the string together. You may cut off the ends of the string to form a short bow up or leave them long.
Another option is to thread the string in a straight line, down through one hole, up through the next then to decorate the cover by looping the extra string though the outside stitching like the other journal example in the video!
Step 3: Glue the White Papers to the Insides of the Covers (optional)
- Spread the glue stick over the inside of the cover and the page next to the cover.
- Align the white paper with the page next to the cover and place the paper on top of the page, firmly pressing down to attach the paper.
- Firmly press the other half of the paper down on the inside of the cover.
- Repeat Steps 1-3 on the back inside cover as well.
After you let the glue dry you will have a completed journal with 20 pages that you made yourself! And as I said in the video, I am going to give gratitude journaling a try. I would love for you to take this cool journal that you made and try your hand at gratitude as well! Let’s aim to write down one small gratitude a day for the next 20 days.
Gratitude Prompts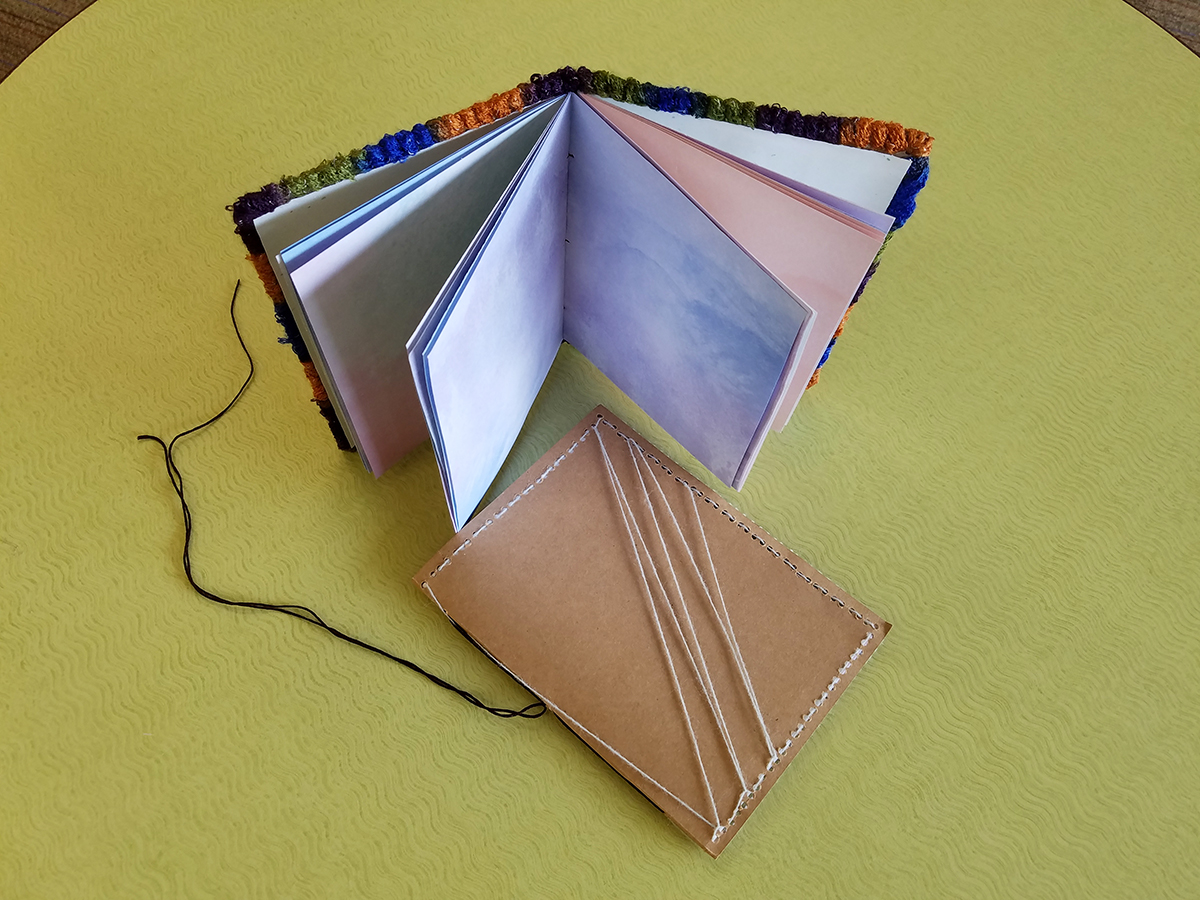
Day 1: Name one activity you really like to do.
Day 2: Write or draw how you feel when you are doing that activity!
Day 3: Write or draw your favorite part of that activity.
Day 4: Write or draw why that part is your favorite!
Day 5: Name one person you love doing that activity with!
Day 6: Write or draw what you love about doing that activity with that person.
Day 7: Name one person who makes you feel special.
Day 8: Write or draw what it is about that person that makes you feel that way.
Day 9: Does that person have a super power? If so, what is it? (Secret: Everyone has a superpower.)
Day 10: Write down what you could say to the person to let them know that you see their superpower.
Day 11: What is your superpower? (See Day 9).
Day 12: Write or draw how you know that’s your superpower.
Day 13: What is your favorite thing to do with your superpower?
Day 14: What do you love about where you live?
Day 15: What do you love about this day?
Day 16: What kind of weather do you love?
Day 17: What always makes you smile?
Day 18: What makes you laugh?
Day 19: What was the last thing that happened that made you laugh?
Day 20: What smells do you love? Why?
Hopefully you’ll take a couple minutes each day to do a gratitude prompt, and then you can come up with your own!
– Cassie, Youth Services Assistant