
This month I’ll be showing how to make your own exposed spine bullet journal! Bullet journaling is a type of shorthand journaling, designed to help set intentions and increase mindfulness and creativity. There is a lot of information out there about bullet journaling, so I am not going to go into very much of it here. I have included some examples of bullet journal templates provided by plannerloveandprintables.com.
The pages I have included in this kit are dot pages. Whether you want to bullet journal or not, these pages are really useful for things like working on your handwriting, drawing up new designs, or creating your own spreads for your journal. Just follow these instructions and you’ll have created your own bullet journal. This activity is best suited for kids ages 8+. Kits are available from the Youth Services Department or the drive-up window while supplies last.
Included materials: 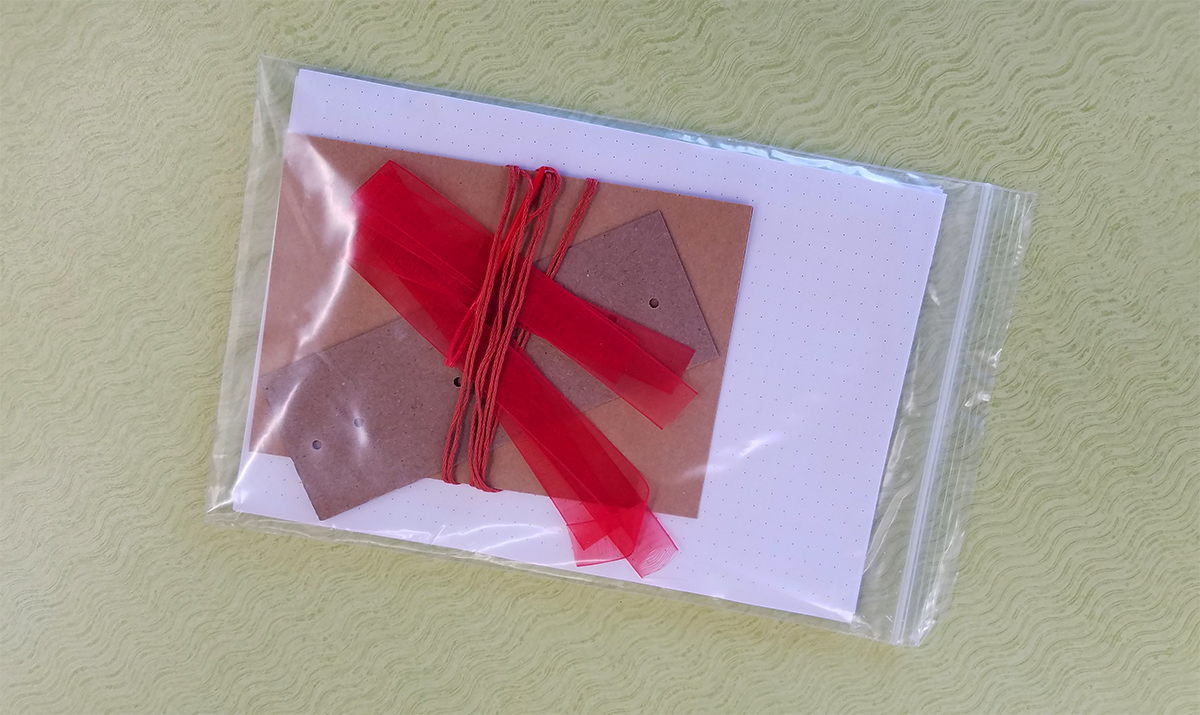
- 32 pieces of dot paper
- 2 yards of colored string
- 3 ribbons 10” long
- 1 cardstock punching template
- 1 plastic needle
- 2 pieces of cardstock (cover)
Materials NOT included:
- Push pin (for punching holes)
- Ruler
- Scissors
Instructions: 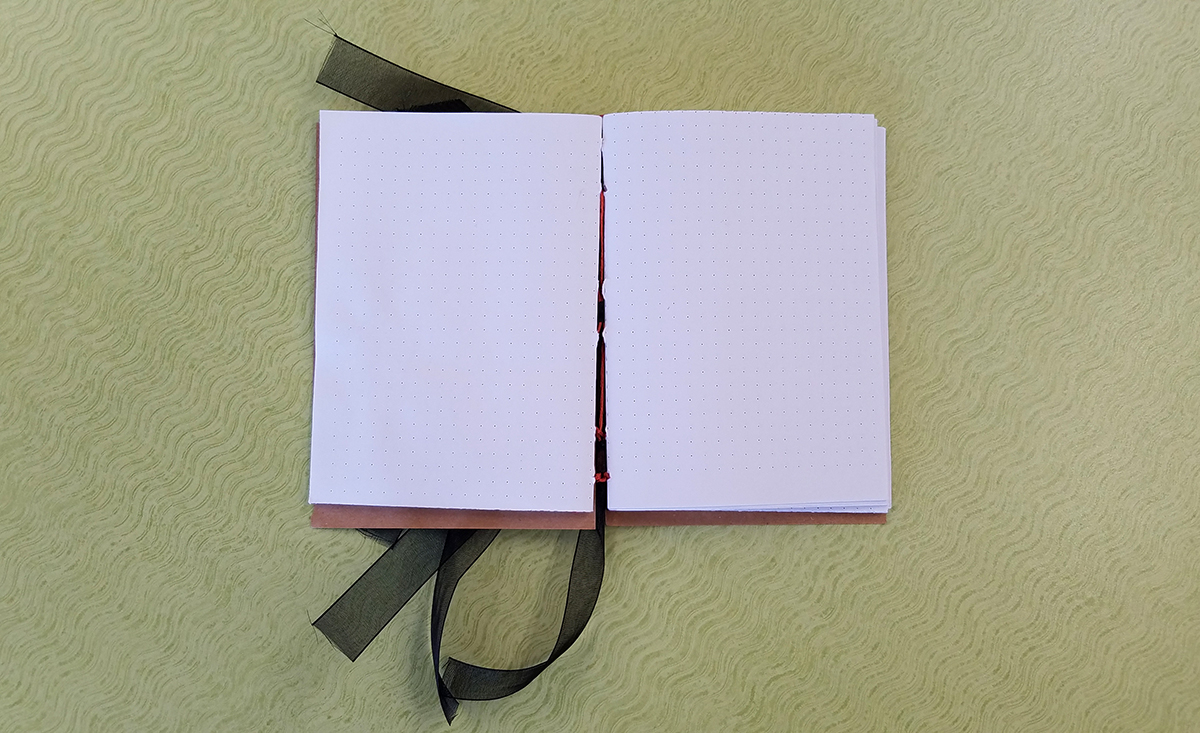
- Put 8 sheets of dot paper together and fold in half.
- Do that 3 more times, so you have 4 sets of folded paper.
- Fold the template in half, so the fold runs through the hole punches.
- Open 1 set of pages to the center, place template in center.
- Use a push pin (NOT included) to punch 6 holes into the crease of the pages.
- Punch holes in the 3 remaining sets of paper.
- Thread needle with the string
- Open first set of papers to center, pull needle through bottom hole from inside to the outside.
- Leave a small tail, thread needle through the next hole from outside to inside.
- Continue until the thread is through all the holes.
- Place the next set of papers next to first set.
- The thread is coming out of the middle of the papers, so you will loop the thread over the tops of the two sets of papers, then from the inside of the top hole, thread the needle to the outside.
- Thread needle through each hole just like in the first set of papers.
- Loop thread over the bottom pages of the second and third set of pages, like in step 12.
- Do this for the third and last set of papers.
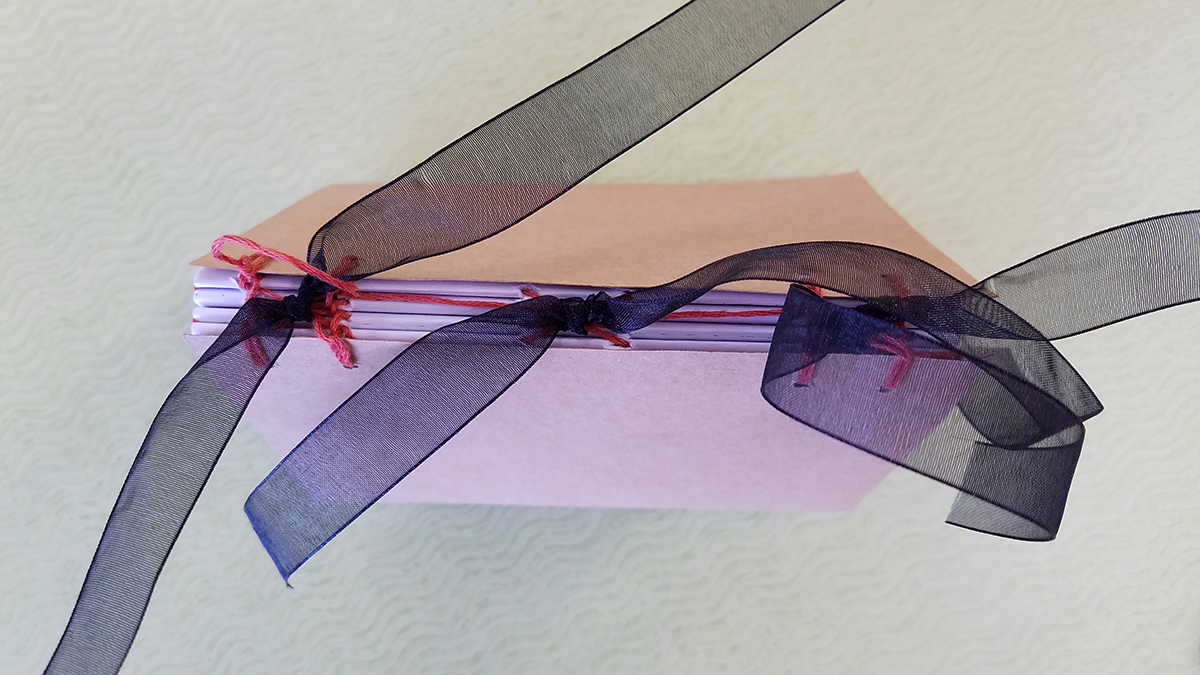
- Thread should be coming out of the bottom from the first set and the last set of papers and spine should have three sets of threads visible, where the ribbons will go.
- Slide each ribbon through the exposed threads until the center of each ribbon is under the threads.
- Take the cardstock covers, align the template so the holes are a ¼ inch away from the edge and punch a hole through the top two and bottom two holes. There should be four holes in your covers.
- Line one of the covers up to the fourth set of papers.
- Pick up your needle and thread, loop over the pages, under the cover and bring needle through the bottom hole, from the inside to the outside.
- Pass the needle back through the same hole, creating a loop coming out of the bottom hole of the cover. (you will need to hold onto the loop)
- Loop the needle under the first set of stitches in the closest set of pages, pulling up towards the cover.
- Thread the needle through the loop and pull tight. (Be careful not to rip the cardstock.)
- Loop the thread back under the first stitch and pull tight, through the loop from the remaining thread.
- Loop the thread under the next stitch in the second set of pages the same way.
- Repeat for the third and fourth set of pages.
- Take the other cover and place it on the fourth set of pages, aligning the holes.
- From under the cover, pull the needle through the bottom hole.
- Create a loop and thread needle back through the same hole.
- Go over and under the stitching, pulling needle back up through the loop you created above the cover.
- Pull tight.
- Go over and under the first stitch again, then thread the needle through the hole in the cover, next to the hole you just attached.
- Create the loop and pull tight, just like the first two loops.
- Work your way back to the first cover just as you did in steps 24 – 26.
- Create the loop the same way as the first three.
- Now take the needle up towards the closest hole in the cover, loop over the stitch and up to the hole in the cover.
- Create the loop as before.
- Continue by following steps 24-35.
- Once you have attached the last loop to the pages, tie a knot at both ends.
- Tie each ribbon into a knot or a bow to finish tightening the spine.
– Cassie, Youth Services Assistant