
Have you been wanting to learn how to add twisting cables to your knitting? Follow the video instructions and the cabled swatch pattern provided below and you’ll be cabling in no time! You can add simple cables to any knitting project using knitting needles, yarn, and a cable needle. Prior knowledge of how to cast on, knit, purl, and bind is needed before you begin.
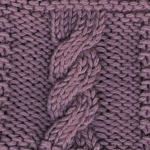
In order to knit a cable, stitches are slipped onto a cable needle. These stitches are held in back or in front of the work while you knit past them. The stitches on the cable needle are then knitted to complete the cable. When slipped stitches on the cable needle are held in BACK of the work, a Right Cross is formed. This is also called a Back Cross. When slipped stitches on the cable needle are held in FRONT of the work, a Left Cross is formed. This is also called a Front Cross.
Introduction to Cable Knitting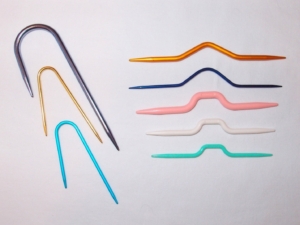
(a cabled swatch pattern)
Using Long Tail Cast On, cast on 29sts.
Knit 4 rows (garter stitch edge)
Begin Cable pattern:
Row 1: K5, P2, K6, P3, K6, P2, K5
Row 2: K7, P6, K3, P6, K7
Repeat Rows 1 & 2 one time (8 rows total)
Cable Row: K5, P2, Right Cross, P3, Left Cross, P2, K5
*Repeat Row 2. Knit Rows 1 & 2 two more times. Knit Cable Row. Repeat from *
Right Cross = Slip 3 stitches purlwise onto cable needle. Move the cable needle to the back of the work. K3 stitches from left needle. K3 stitches from cable needle.
Left Cross = Slip 3 stitches purlwise onto cable needle. Move the cable needle to the front of work. K3 stitches from left needle. K3 stitches from cable needle.
Continue knitting until the swatch has reached the desired size or you are comfortable with your cabling.
After a Row2 , Knit 4 rows and bind off.
– Melissa, Reference Assistant